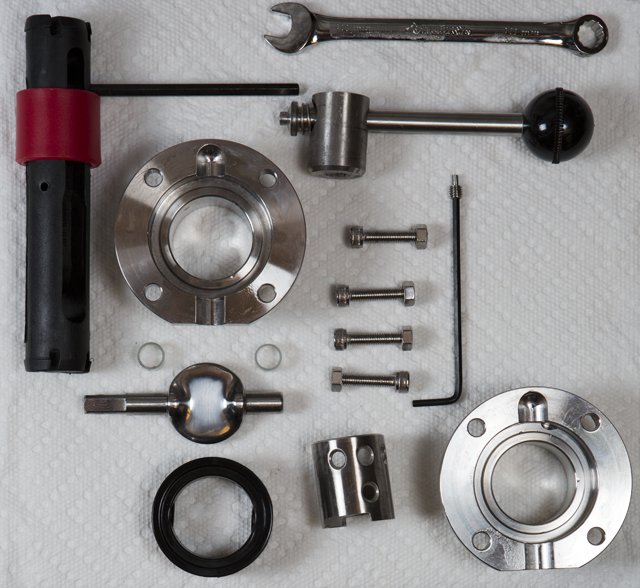
I switched from using a ball valve to a butterfly value on my conical due to problems inherit in the ball valve design. It was impossible to get a leak-proof seal with the o-ring. Fortunately, Stout Tanks gladly replaced my ball valves and I paid the difference in price.
It was easier (in theory) to disassemble the ball valve. All you needed was two big wrenches on either end and twist them open. But, in practice, the shoddy build quality meant I had to use two slightly different wrench sizes. While I worked around this problem, I could not get around the o-ring problem.
The butterfly value is a little harder to break down and put together. First, you have to use a tiny allen wrench (number 3 metric size) to separate the handle. There is a hole below middle one of the three stops which reveals the screw. When it is unscrewed, you can pull off the handle and cylindrical guard.
Next, you have to unscrew the four bolts. I use a number 5 metric size allen wrench on the bolt and hold the nut underneath it with a 10mm wrench. Once all four are off, you can remove the large rubber o-ring.
Then you can squeeze the two sides of the o-ring and remove the butterfly valve and also the two plastic guards? on both ends.
I clean everything well and put it back together in reverse order. I also use some vasoline to lubricate the butterfly valve. (I don’t know if that is official though).
It takes longer to clean, but it is a really solid and sturdy product!

